A Guide to shooting Street Photography at Night

Street Photography at night time can be difficult, especially for those starting out. It took me years before I was comfortable capturing street photos in the evening. So in this article I’m going to share some advice and tips to help those of you who want to shoot at night too.

Gear for Street Photography at Night

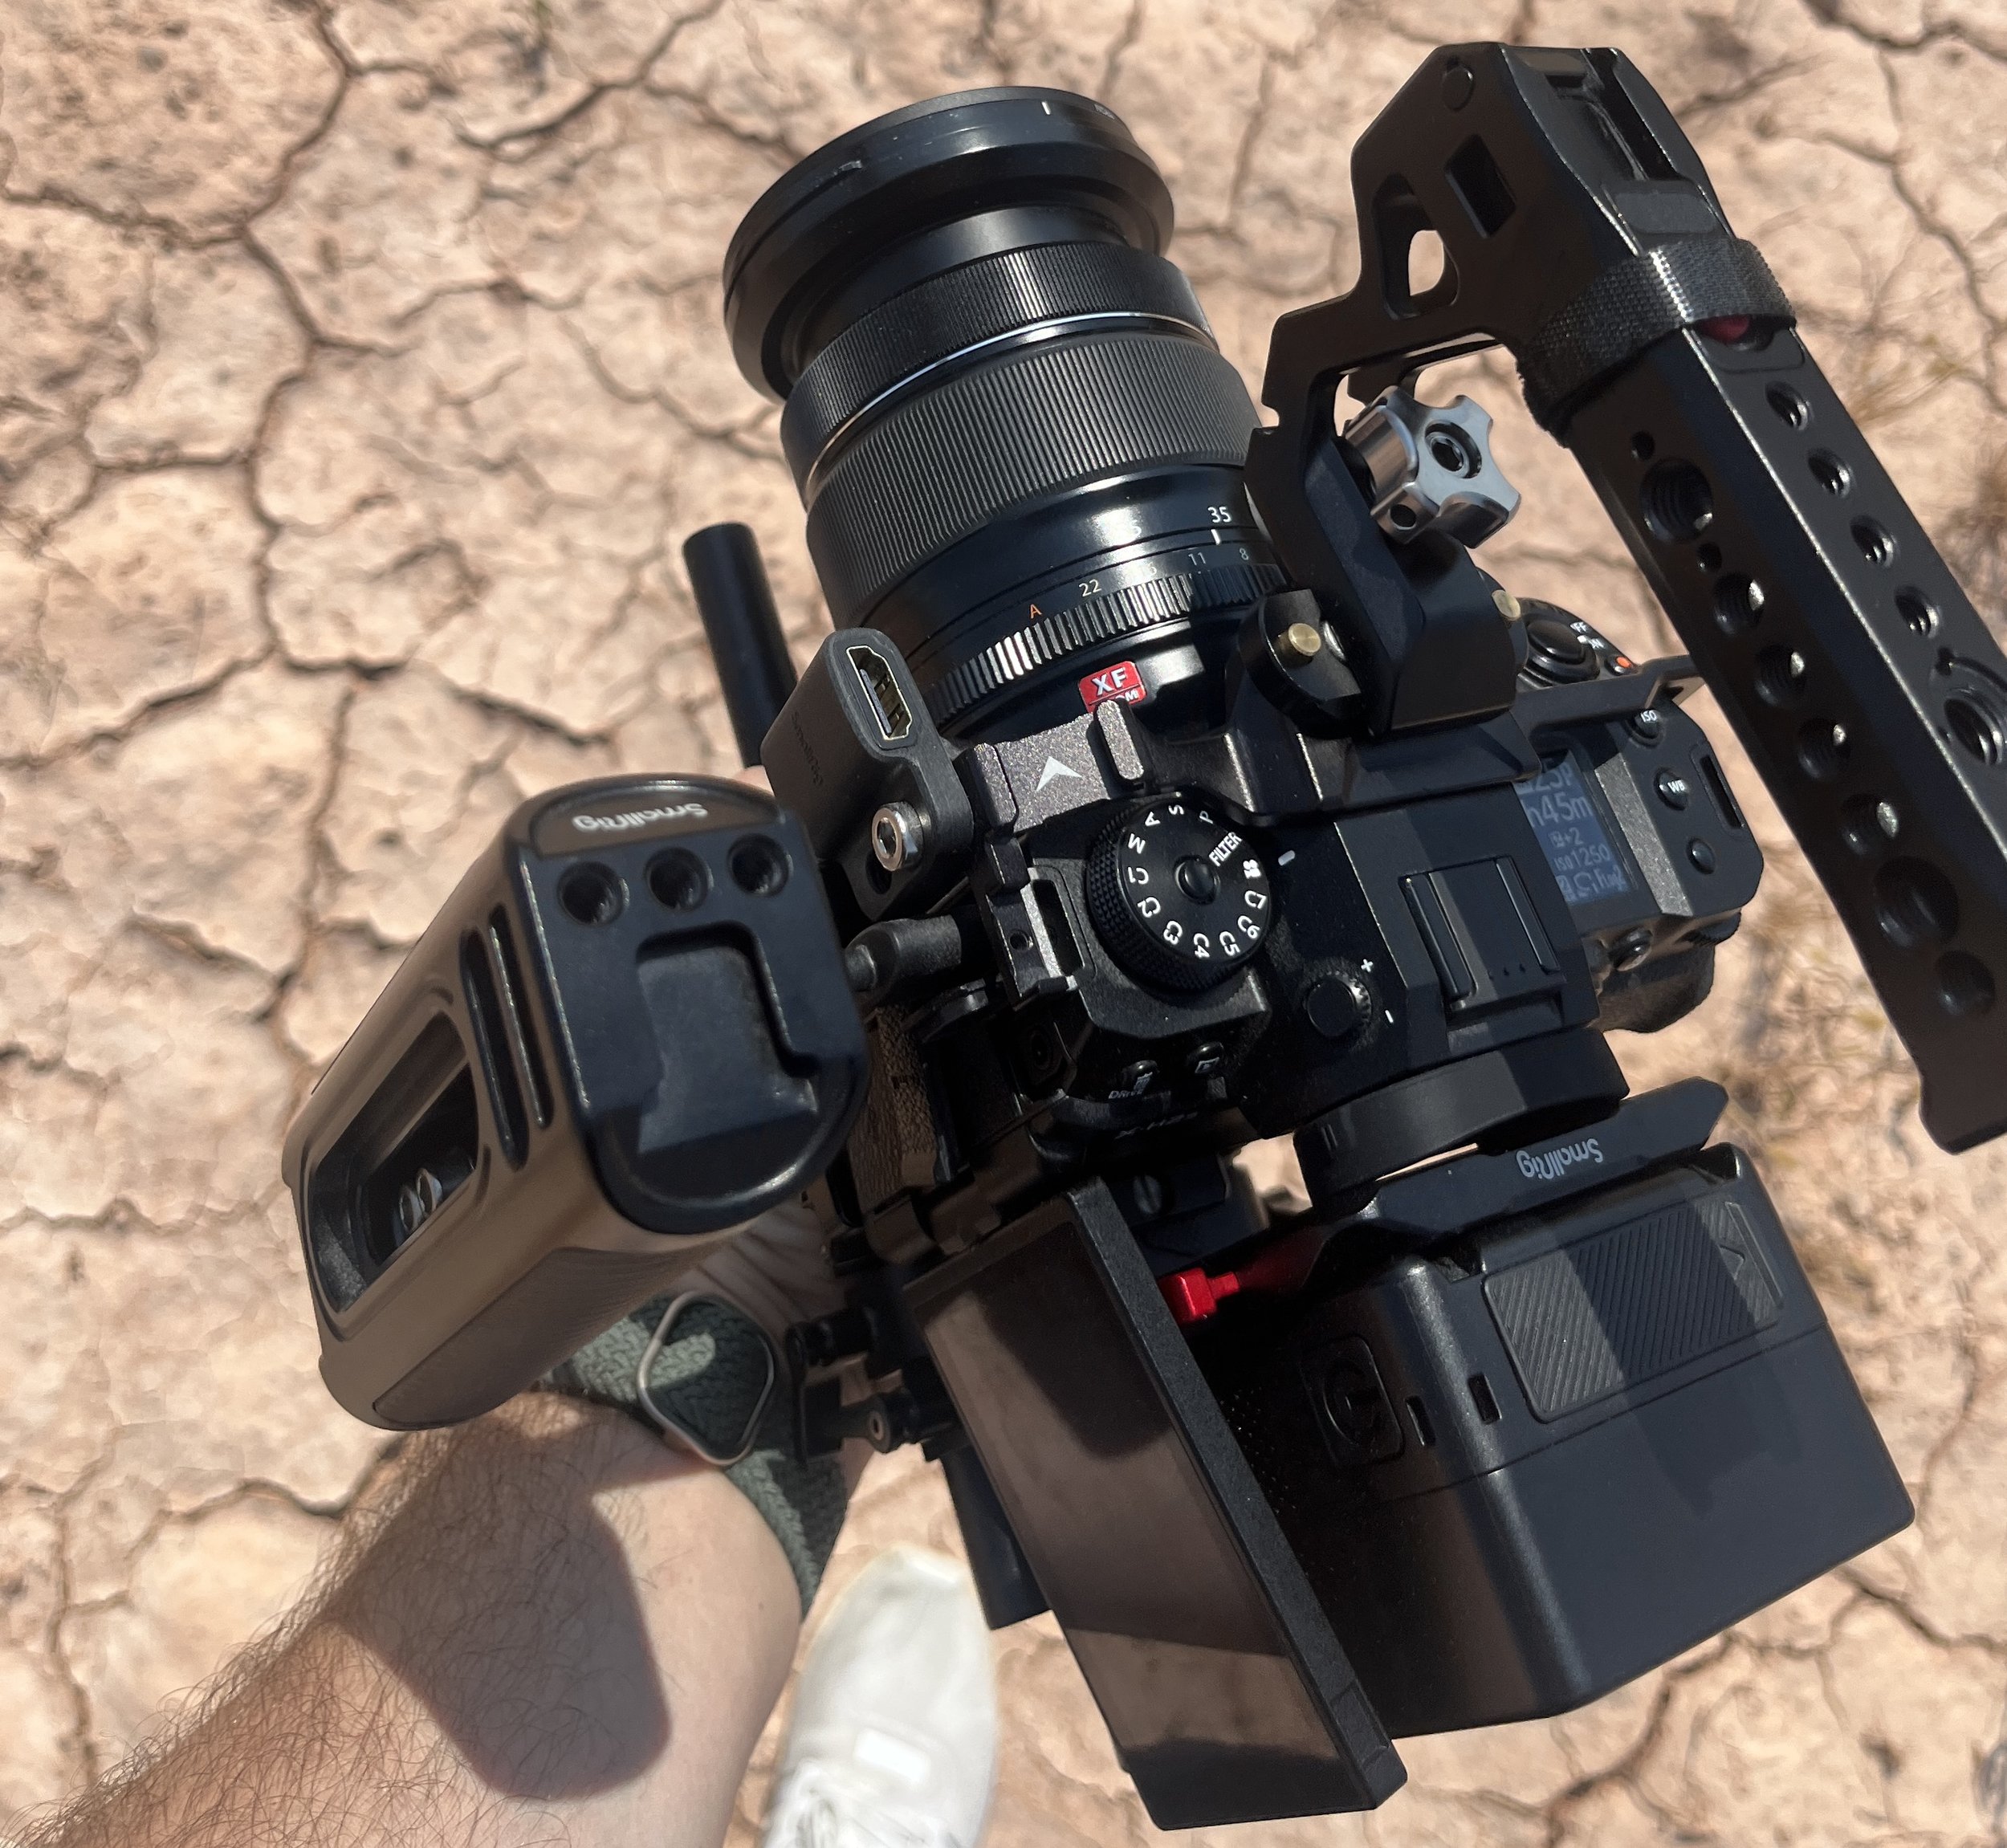
First up let's talk about gear. You’re going to want to use faster lenses (lenses with lower F stop values) while shooting at night. The faster your lens is, the more light it will let in, which is exactly what you need when shooting after the sun has gone down.

With that said, you really don’t need an expensive prime lens to shoot at night. I often shoot with the Fujifilm’s f2 primes or even the Sigma 18-50 f2.8 works well too.

Also worth noting that you should try and set your aperture wide open - so if it's an f1.4 lens, shoot at f1.4 , if it's f2 set it at f2 and so on. As I said earlier, the wider your aperture is, the more light will be let into your lens.

As for which focal length to shoot with at night, I’d say just experiment. I like to use the Fuji 56mm 1.2 or the 90mm to get more creative with abstract compositions whereas I use wider lenses like the 16mm or 23m to capture more traditional street photos of people in interesting locations.

Night Street Photography Settings

When it comes to shooting at night there's a couple settings to be careful of.

Firstly, shutter speed. Unless you want to bring motion blur into your photos for creative reasons, set your shutter speed at double your focal length. So if you have a 24mm lens set a shutter speed of at least 1/48 and above.

I tend to set 1/60 so my minimum shutter speed however, if I want to capture blur then I will shoot at around 1/30.

Next up ISO. Don't be afraid to push your ISO higher when shooting at night. ISO refers to the sensitivity of your sensor so for darker scenes you’re going to want a higher ISO setting.

On Fujifilm cameras you can set an upper limit for the ISO - I tend to keep that at around 3200 for most of my street photography at night or go up to 6400 if I'm shooting in a really dark scene.

It’s also worth remembering that the higher you push your ISO setting the more noise you will bring into your photos which in turn will make them more difficult to edit in post too.

Finally exposure compensation. The exposure compensation setting is an easy and quick way to reduce or increase the exposure of the photo you are taking. While shooting at night I try to avoid blowing out my highlights as digital cameras tend to struggle with retrieving details out of highlights, but are very good at recovering details in shadows.

Therefore if I'm shooting scenes with bright lights, I will slightly under-expose my photo and recover the shadows in post.

One final thing when it comes to settings, always remember to shoot in Raw. When you shoot Raw you capture more data in the shadows and highlights compared to JPEGs, so when you edit the photo you have more room to bring up the shadows and edit the colours. Shooting RAW also allows you to set the white balance in post too.
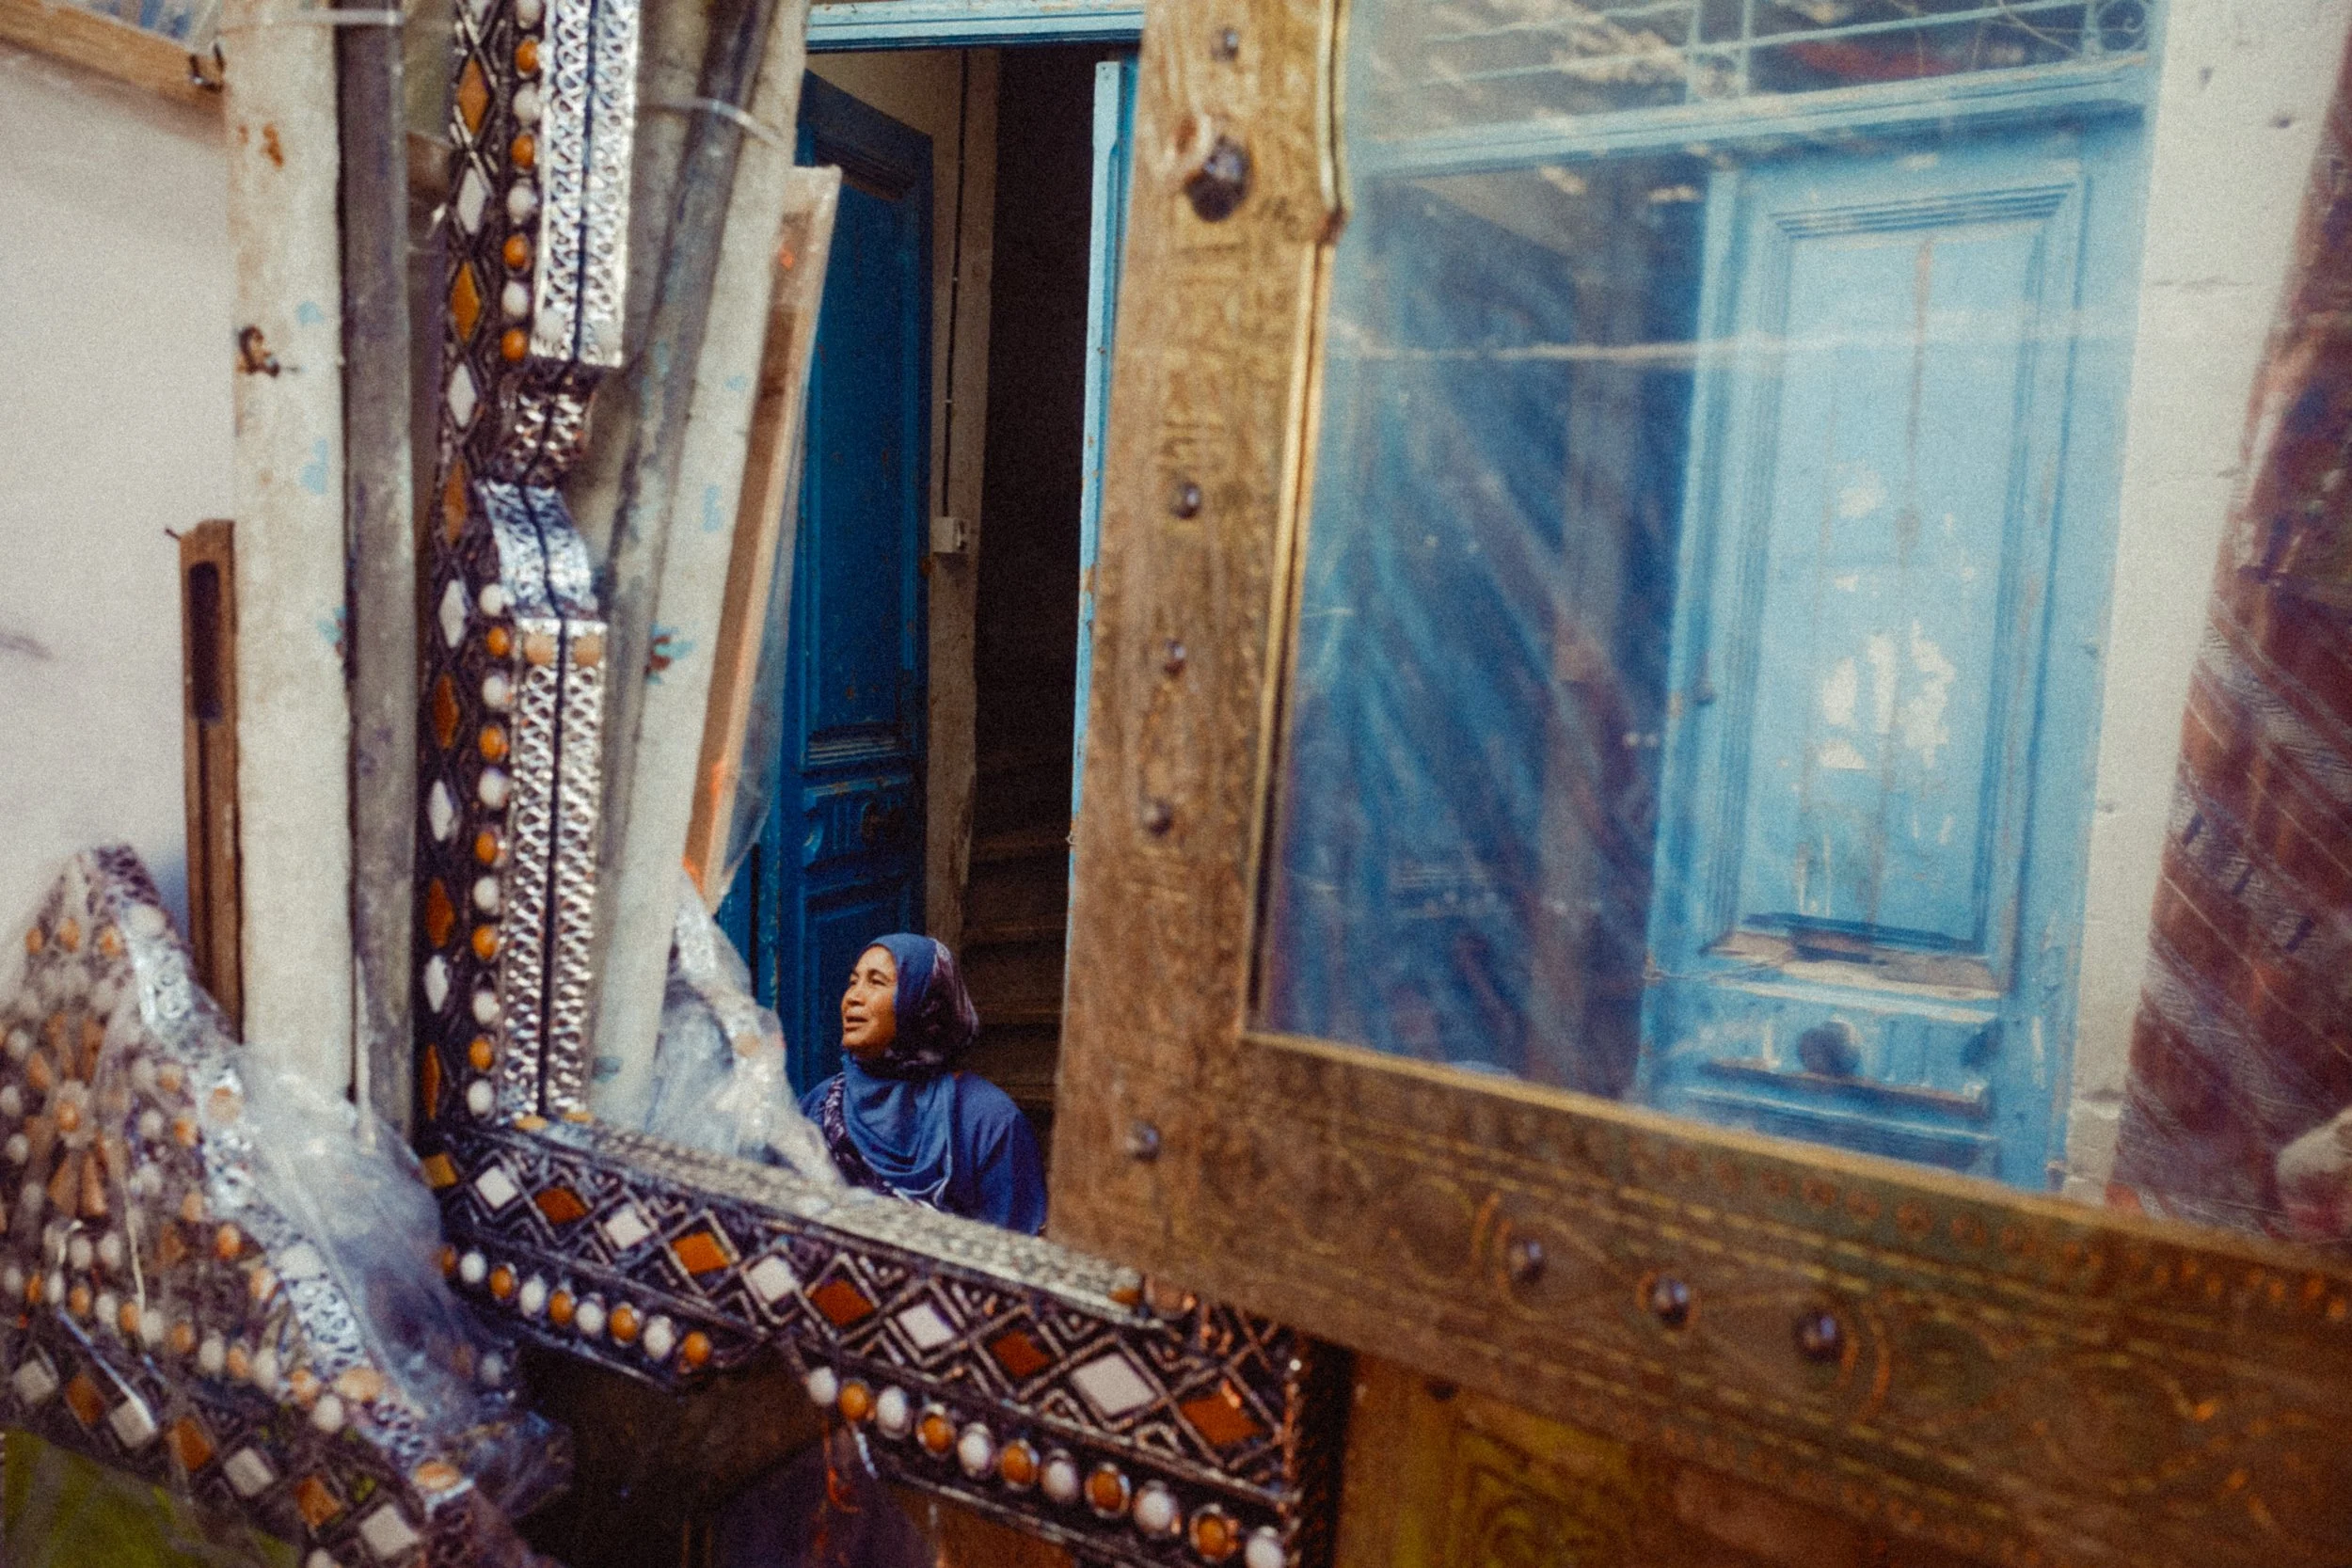
Fishing Technique

A useful tip for street photography at night is to use the fishing technique.

In street photography the fishing technique is when you find  a scene or composition you like and then wait patiently for the right subject to walk into frame.

I find this works really well at night as people tend to notice you less opposed to your waking up to your subject and taking a photo of them directly.

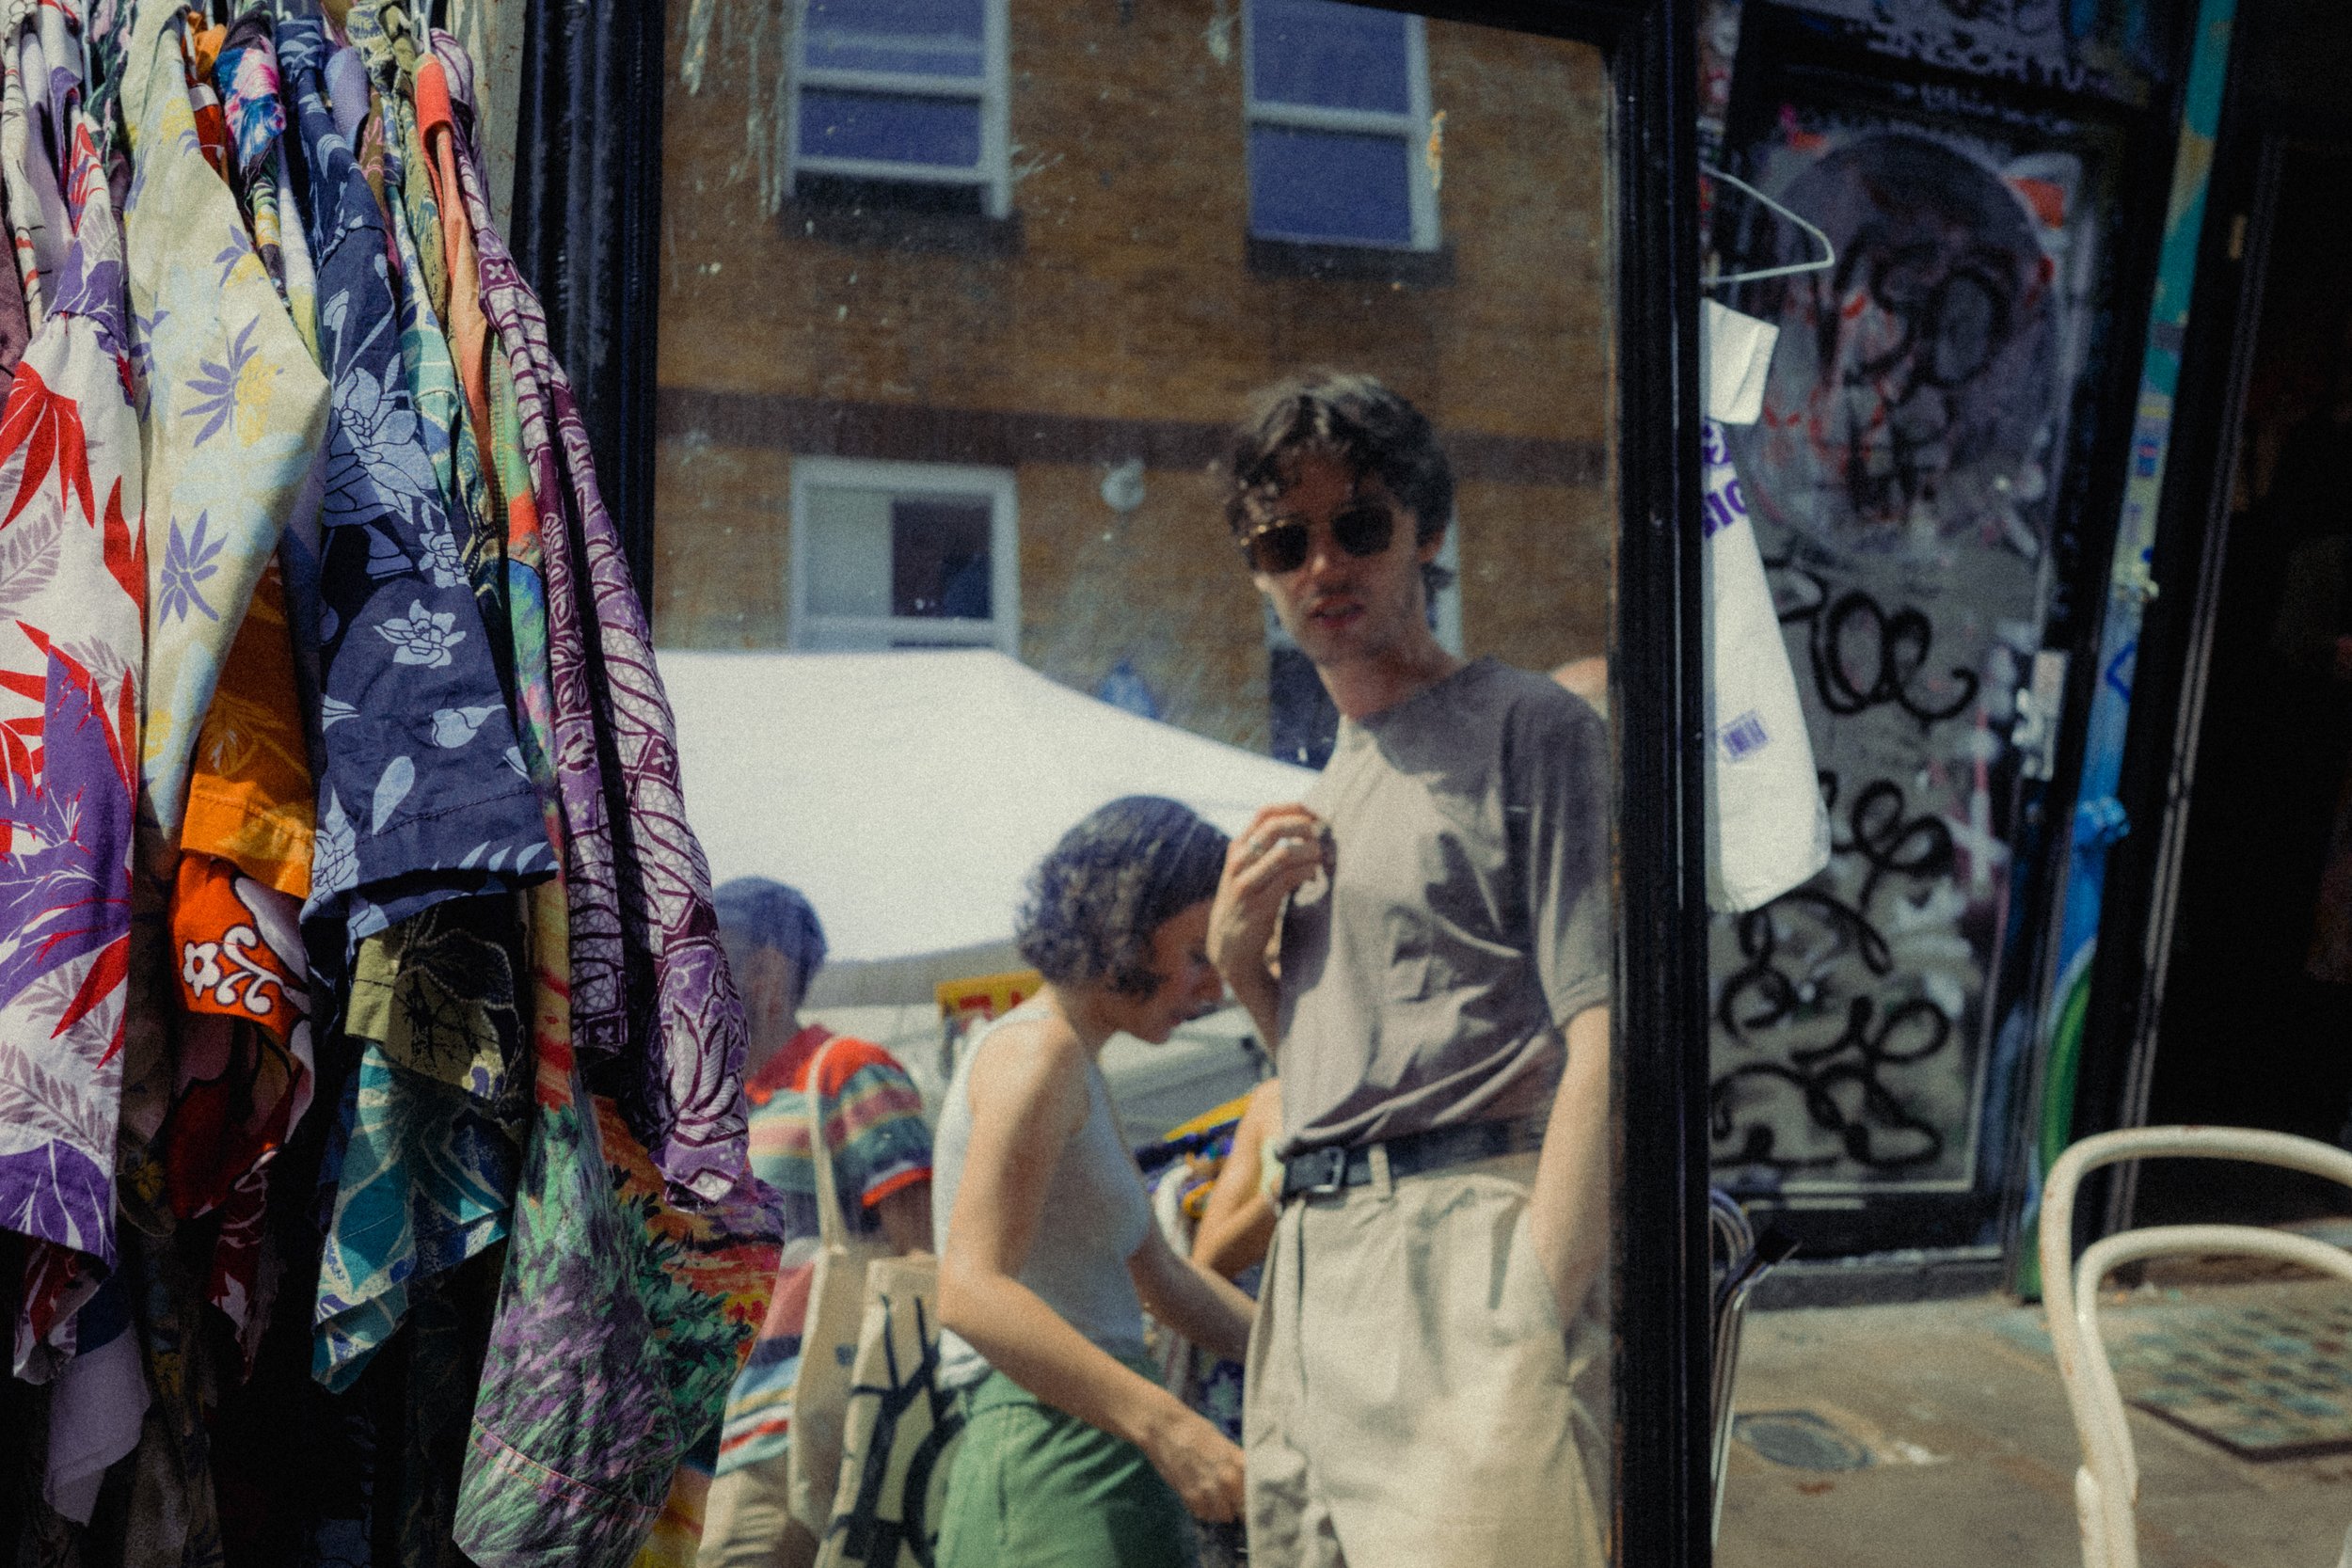
Get Creative and Stay Safe

The reason I love shooting at night is you get to be a little more creative than you can during the day. There's more interesting light, generally more interesting subjects and it's also easier to get creative with things like reflections, slower shutter speeds and colourful lights.

Your photos don’t have to be perfectly sharp or even in focus, I tend to find photos with motion blur or being slightly out of focus to be more interesting, especially for photos taken at night.

Side note - do stay safe, shooting at night can be a little more dangerous, I’d advise not using headphones, try going with a friend if you can and take a small bag with you to slip your camera into while walking around or if you feel unsafe.

My Fujifilm Street Photography Gear in 2025 - Plus Ricoh GR

So these are the cameras, lenses, and accessories I will be using in 2025. From what I've read so far, there won't be any major releases from Fuji this year, so I doubt there will be many changes in terms of gear until the end of the year.

Cameras

Fujifilm X100VI

The camera I used the most over the past 12 months is the Fujifilm X100VI. I really enjoy using this camera and I've found myself gravitating towards it over my XT5. The X100VI has been great both for photography and video. I pretty much bring it everywhere with me, love the design, and it will probably be the camera I use the most this year too.
t's also worth noting that the video features are probably the most underrated aspect of this camera.

Fujifilm XT5

Another Fujifilm camera I use all the time is the Fujifilm X-T5. I use this as a hybrid video and photography camera and it has been really useful for both my photography and professional work.

It's worth noting that the X-T5 and X100VI share the same sensor, which makes editing photos from either of these cameras easier. Again, I've been really happy with the photos and video from the X-T5.

Fujifilm Xh2S

The final Fujifilm camera I'll be using is the X-H2S. Now I'm not a big fan of the dials on this camera, and I find it to be a little too large and heavy for street photography, however, I love the video I'm able to record from it. I really wish Fujifilm would create a dedicated video camera, but for the time being, I'll be using the X-H2S.

RICOH GR IIIx

I also have a RICOH GR iiiix – which is the camera I bring around with me for those times where I don't want to carry a larger camera. This Ricoh is also really useful when taking photos in locations where I wouldn't be comfortable using a large camera. The best thing about the Ricoh is that it looks like a cheap point-and-shoot, so nobody really takes it seriously.

Voigtlander Bessa R3A

Over the past year, I've also started shooting film and picked up the Voigtlander Bessa R3A on eBay – but I'm pretty new to shooting 35mm film, so we'll see where this all goes.

Lenses

Fujifilm 35mm f1.4

First up is the 35mm f/1.4, which is probably still my favorite and most-used Fuji lens. I've tested out the 33mm numerous times and I do like it but not enough to drop the 35mm 1.4.

Fujifilm 56mm f1.2

While this lens was designed with portrait photography in mind, I love using it for street. The longer focal lengths work really well with my style of shooting, and I've taken some of my favorite photos with the 56mm 1.2.

I actually still prefer the old version of this lens as it's both smaller and lighter.

Fujicron - 23mm f2 | 35mm f2 | 50mm f2:

I also still use the Fujifilm f2 primes – 23mm f2, 35mm f2, and the 50mm f2. I usually take these with me on trips and swap over to using them when I want to have a lightweight setup or if the weather conditions are bad.

Fujifilm 16mm f1.4:

Finally on the primes – I also have the Fuji 16 1.4 – IMO is one of Fuji's best – which I use a lot for video and professional work.

Sigma 18-50mm Zoom:

As for zoom lenses, I have the 18-50mm Sigma, which I use mostly for travel. I actually sold my Fuji 16-55 after getting the Sigma as this lens is pretty much as good quality-wise while being a lot smaller and lighter.

Accessories

Bags & Cases:

I rarely use desiccated camera bags as they tend to be ugly, and I prefer shooting with as little on me as possible. If I do carry a bag, it'd be a regular sling bag just to slip batteries and lenses into.

I also have cases from Wotancraft for both my Ricoh GR iiiix and X100VI, which help protect the cameras while traveling.

Editing:

I use both my MacBook Pro M4 and iPad Pro to edit my photos and videos. I use Lightroom for photos and a mix of Final Cut and DaVinci for video editing.

So that is pretty much all the gear I'll be using this year. I have a video on this on YouTube (above), and here is a link to all the gear I use for my Photography and Video work.

Trip to Tunis: Ricoh GR iii the Ultimate Travel Camera

Last month I spent a week in Tunisia’s capital city Tunis. It wasn’t a photography trip as I was there for a friend’s wedding, however, since I was in town for a couple days, I decided to pack my cameras too.

Unlike nearby North African countries such as Morocco or Egypt, Tunisia is one I rarely ever see photography from and furthermore, while I was there I didn’t see a single photographer wondering around. This made it a more interesting place to shoot for me but also threw up another challenge - as the moment I put the Fuji X100VI around my neck, I was being stared at constantly.

This is to be expected as Tunis isn’t a popular destination among photographers and also made it difficult for me to capture the locals going about their daily lives.

This is where the Ricoh GR iiix came in. I picked this camera up around a year ago and have brought it with me on days where I don’t expect to be shooting. However, for this trip it was the MVP. The single best thing about the Ricoh GRiii - apart from this APSC sensor inside of a tiny body - is that it looks like a cheap point-and-shoot.

Ricoh GR IIIx Review

Nobody takes this camera seriously, you can enter museums, galleries, concerts and football games with little to no objections. Its tiny size and its fairly standard looks mean it doesn’t stand out, nobody comments on its design and it largely goes unnoticed.

As for Tunis, I really enjoyed my time there. It’s a pretty small city, four to five days is more than enough to see most of it. Also, the city doesn’t share the same intensity as cities like Istanbul or Marrakesh either which made it a more comfortable shooting experience for me.

To wrapt his one up, I’ve attached couple photos from the trip mostly shot on the Ricoh GR IIIX.

Ricoh gr iiix Review: The Perfect Street Photography CAMERA?

The Ricoh GR iiix is easily one of the most hyped and talked about street photography cameras in recent times. After using this camera for the past six-months I totally understand why. However, despite loving the Ricoh, It isn’t a camera I'd recommend to everyone.

Pocket Power:

So I’ve been using the Ricoh GR iiix for just over 6 months at this point, mostly for street photography both here in London and while travelling. After all this time, it still amazes me that Ricoh has managed to get an APS-C sized sensor into a camera body this small.

The size of the Ricoh GR iiix is the main reason why anybody gets this camera. Usually, cameras this small have much smaller sensors and which directly impacts the image quality. The Ricoh GR iiix has a 24mp APS-C sized sensor. That's pretty much the same size sensor you get in Fujifilm’s x-series cameras such as the X-T4.

After reviewing photos from this camera for the past couple months, I'm really impressed by the quality of photos I’ve been able to capture. For me, the Fujifilm files are still marginally better but it's really close, and more importantly I can edit these files pretty much the same way I edit my fuji files so I don’t have to change my workflow and how I edit my photos.

In all, you’re getting photos close to what you get with much larger cameras, in a tiny package you can bring pretty much everywhere.

Now on that very point, there are times and places where you cannot or shouldn't use a larger camera. For example, while travelling, if you are in a shady area, or shooting at night, it probably isn't the best idea to be walking around with a large camera. Also in certain locations like train stations or shopping centres, security may ask you to put your camera away if you’re walking around with a DSLR, but with the Ricoh, nobody really notices it or bothers you.

The truth is, the Ricoh GR iiix looks a bit like a cheap point and shoot, and most people will just think you’re a clueless tourist while using it, which is actually one of the best things about it.

The Focal Length:

There are actually two versions of this camera, the iii which has a wider angle lens, and the iiix which uses a 40mm lens. I prefer the 40mm FL - that works out around 27mm on Fuji. Which version you choose is down to personal preference but focal length aside, they are the same camera.

Look and feel:

As for using and holding this camera, It's lightweight, easy to hold and is pretty straightforward to use too. There's just one dial at the top, a couple buttons at the back and you can use the touch screen to select your focus point.

The screen is ok, but not great and is actually hard to see when it's really bright outside, which is a bit of an issue seeing that there isn’t a viewfinder.

Final thoughts - Who is this camera for?

The Ricoh GR iiix is for a very specific type of photographer and despite really liking it, I wouldn’t recommend it to everyone. The main reason I say this is the price. This camera costs around $1000/£1000 new - which is expensive. Keep in mind that a new XT4 is around the same price and is a better camera on pretty much every front - but is larger.

For me, the size of this camera makes it worth it and it was the reason why I opted for it over the Fuji X100v. However, for the same price you can get a better camera which will give you far more flexibility, and will take better photos and video too.

So it really comes down to what you prioritise, if you want something small and light and are happy to stick to one FL, you can’t really go wrong with the Ricoh. But if you’re new to photography, or will only be using one camera body, I’d probably opt for one of Fuji’s cheaper interchangeable lens cameras instead.